Spiderman Shorts

I have a new machine for my sewing – an overlocker!

It’s quite a scary looking thing, and I’m still getting used to it and working out how it all works, but am using it to make some clothes. I’m hoping it will speed up my sewing.

The first thing that I made with it was some shorts.

Spiderman has been a big hit in our house recently, so when I came across some Spiderman fabric I had to buy some. I bought a half metre, which was just enough for some shorts.

I used the MADE shorts pattern, with a flat front and elasticated back waist. I made a size 3, with a slightly smaller waist, having a particularly skinny 4.5 year old!

I used my new overlocker to finish off the inside seams instead of zigzag stitching like I have in the past, which was much quicker and looks nice and neat. I overlocked the bottom hem, and then turned up and used a twin needle to sew it, rather than turn and turn again.

Here are my finished shorts:

And here they are being modeled, along with his Spiderman jumper (which I didn’t make) and his new haircut with gel to make it spiky:

Does he really love his new shorts? No! He’s complained that I didn’t put in any pockets.

There’s no pleasing some people!

Modern QAL – Final Link Up

So for the last year I’ve been making a block a month for the And Sew We Craft Modern Quilt-ALong. This month was the month to finish up and sew all those blocks together.

I saw that several people had chosen to make their finished quilts 3×3 blocks big, and use the final three blocks on the back. Now there are some blocks that I like better than others, and 3×3 seemed a much easier size to handle, so I decided to go with this idea too.

Just sewing the blocks together would have been the simplest way to go. Was this what I chose? No – I decided I wanted to do the whole proper sashing between blocks. It’s my first quilt, so might as well try everything!

I also had all those bits of fabric left from making the blocks that I wanted to use up, so thought why not make the sashing up of lots of 2.5 inch squares. 160 squares cut out later – I wasn’t really so convinced of the greatness of this idea!

I then put the quilt top aside for a couple of weeks, until yesterday evening, 21st June, I thought I better have a quick check at when the deadline for entering my quilt top into the linky thing actually is.

“Linky closes in 19 hours”

Arghh!

So after some speed sewing, photographing, and typing (I currently have 15 minutes remaining) I made it – hurrah!!

Here is my finished quilt top for the Modern Blocks QAL 🙂

It’s pretty colourful with all those little squares around the outside!

The final three blocks will go on the back, and hopefully I have a fully quilted and bound quilt to share photos of soon!

Edited to add: I linked up with 6 minutes to spare – phew! You can see all the quilts that people made and shared over on ASWC.

Modern QAL – April Block

It’s April, and the final block for the Modern Blocks QAL. And I’m even caught up with posting my blocks and linking this one up on time!

April’s block is called Stacked Squares, and like all the blocks comes from this book:

I have to admit that this was not one of my favourite blocks as it has a large block of solid colour, so only uses the one colour. I think I prefer some of the others where I could use more of the range of colours I chose for the quilt, but it will be interesting to see how all the blocks look together when the quilt is fully sewn.

Here is my finished block:


You can see all the other blocks that people have made over on And Sew We Craft 🙂


This post contains affiliate links.

Modern QAL – February Block


It’s February – oh wait, no it’s April!

It’s about time I caught up with posting my blocks for the Modern QAL, since this is the last month before putting all the blocks together!

February’s block was called Parisian Star, and like all the blocks comes from this book:

Here is my finished block:


You can see all the other blocks that people have made over on And Sew We Craft 🙂


This post contains affiliate links.

Adult v-neck t-shirt v2

The final Christmas present 2013 post!

After the t-shirt I made turned out too small, I went back and cut out the size large pieces instead. I used the same Charlie Tee pattern by Fishsticks Designs, and again drew on a v-neck, rather than the original rounded neck. 
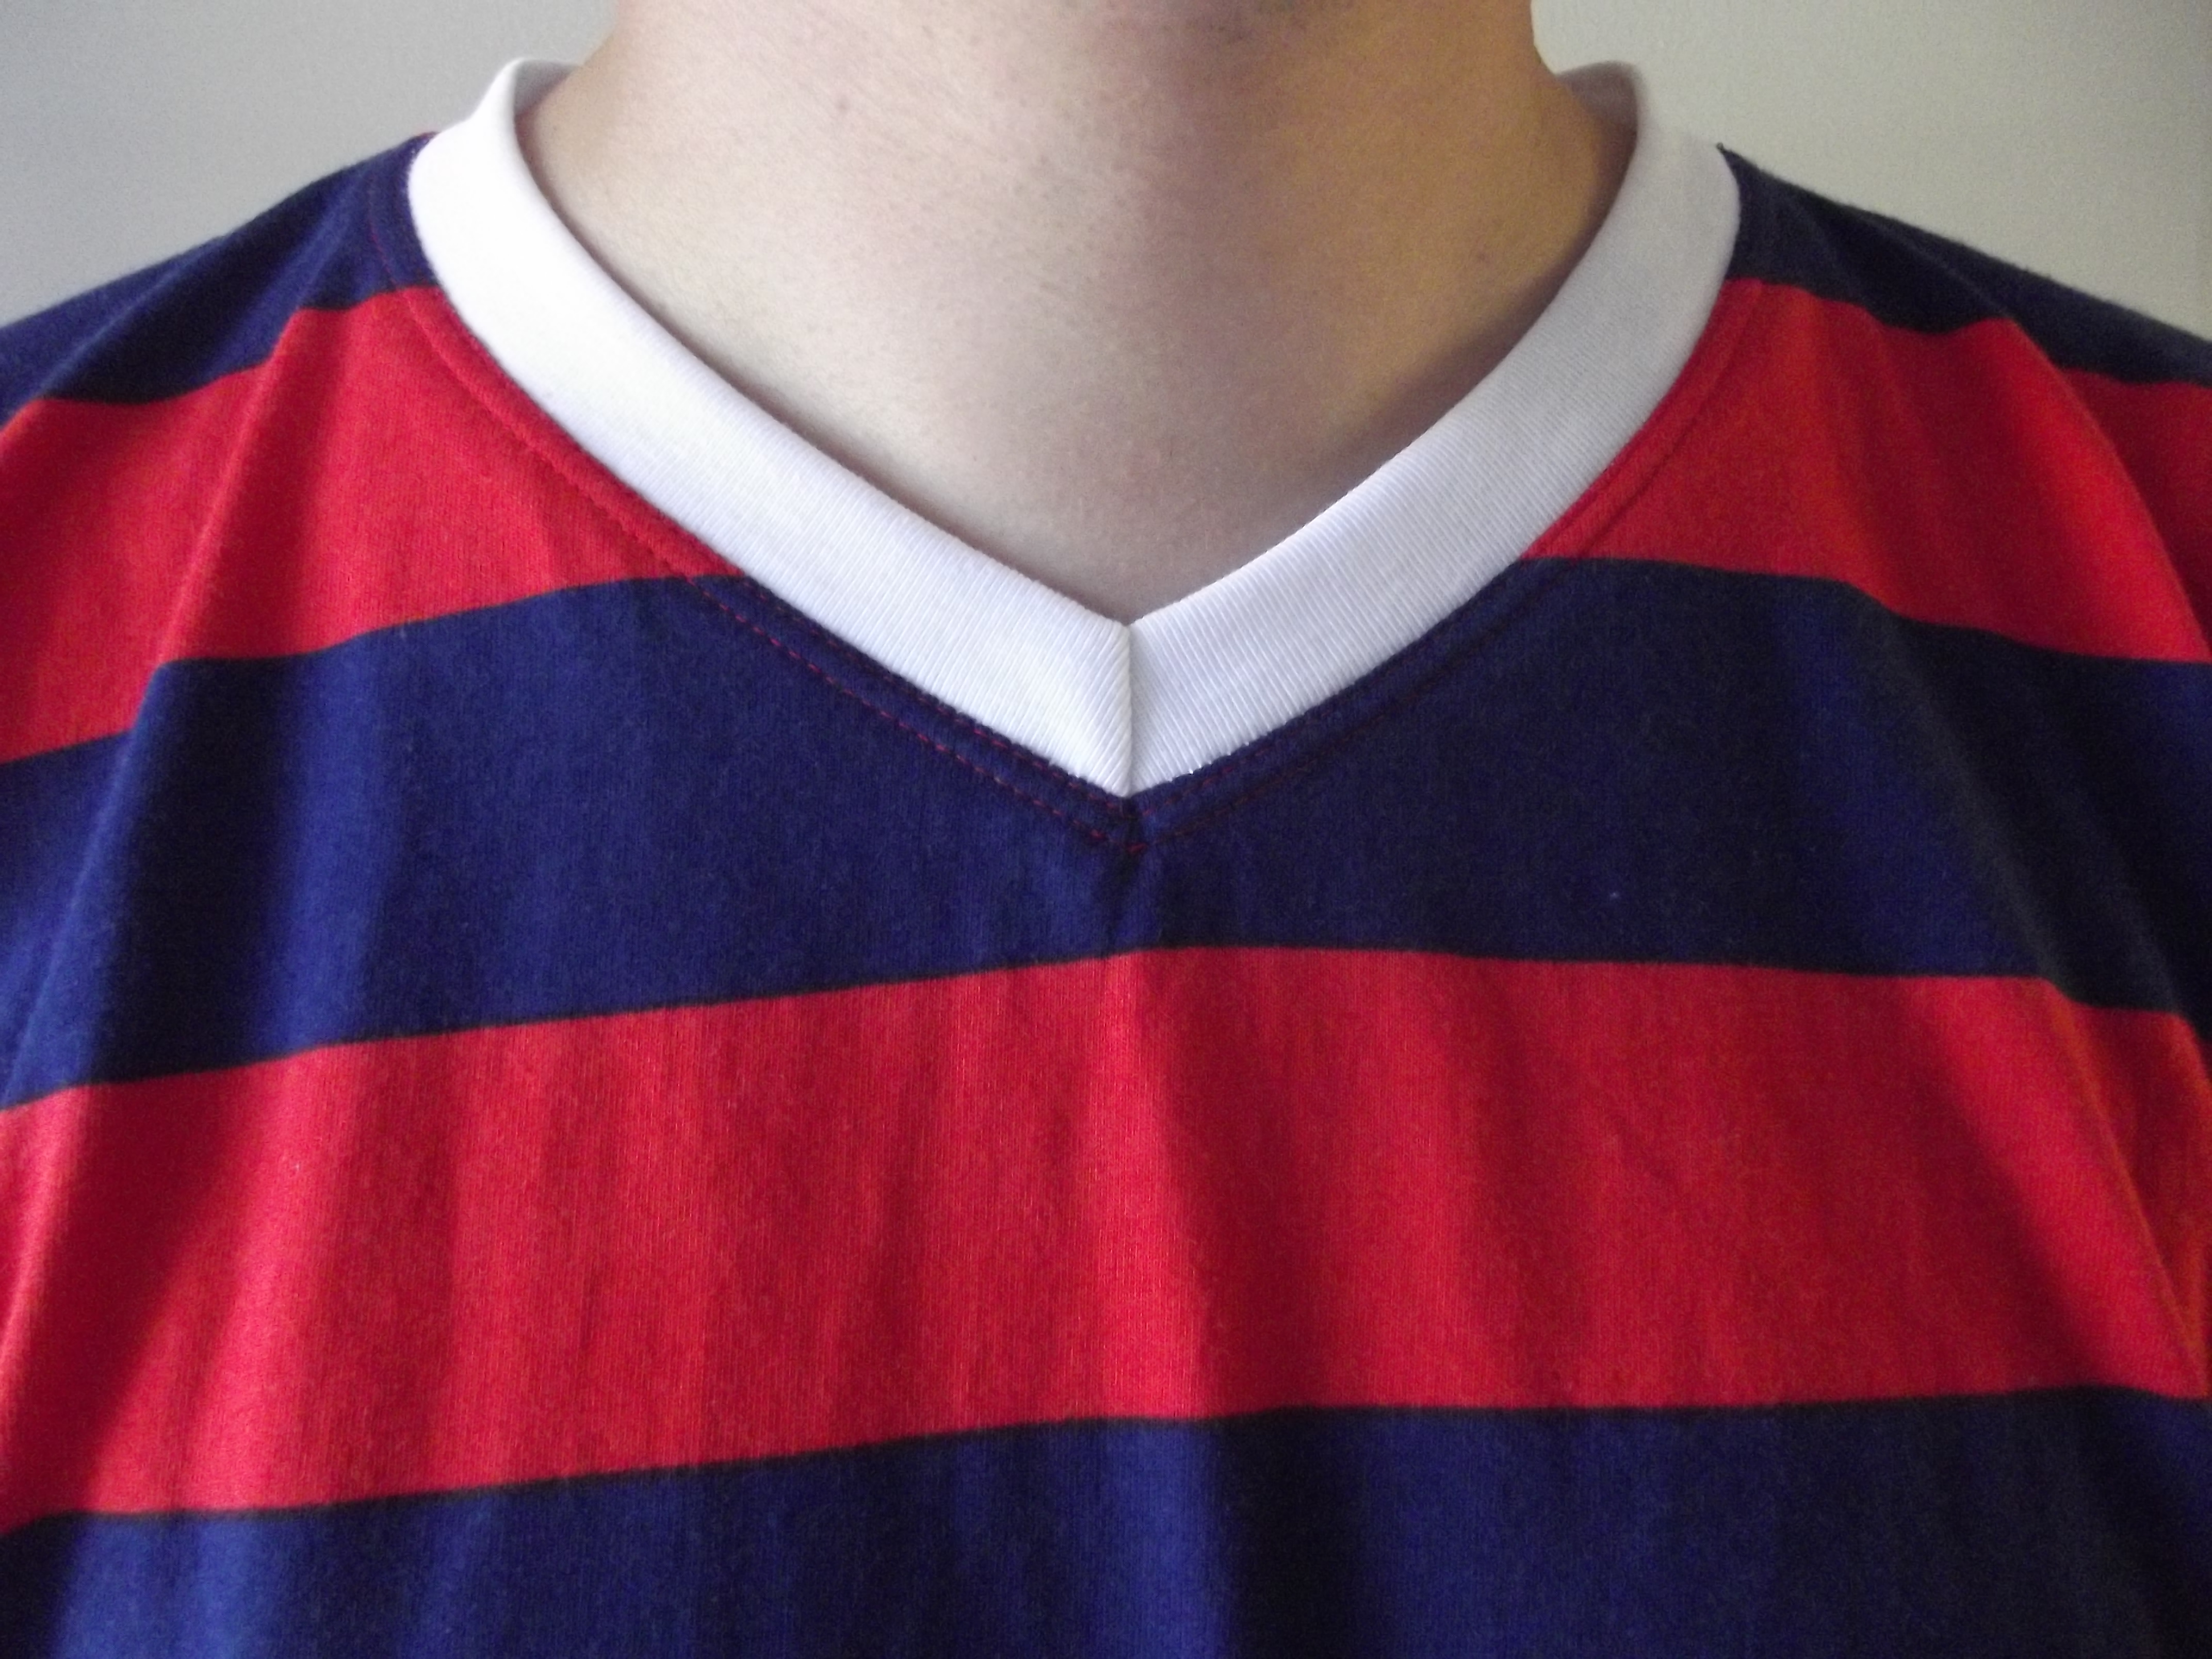
I followed the instructions from the children’s v-neck pattern I have, and stay stitched the v before adding the neckband on. I’ve never done that before as I didn’t really see what difference it would make, and it means changing the double needle to a single and back again, but actually it does make the v much flatter! So perhaps following the pattern properly is a good idea after all! 
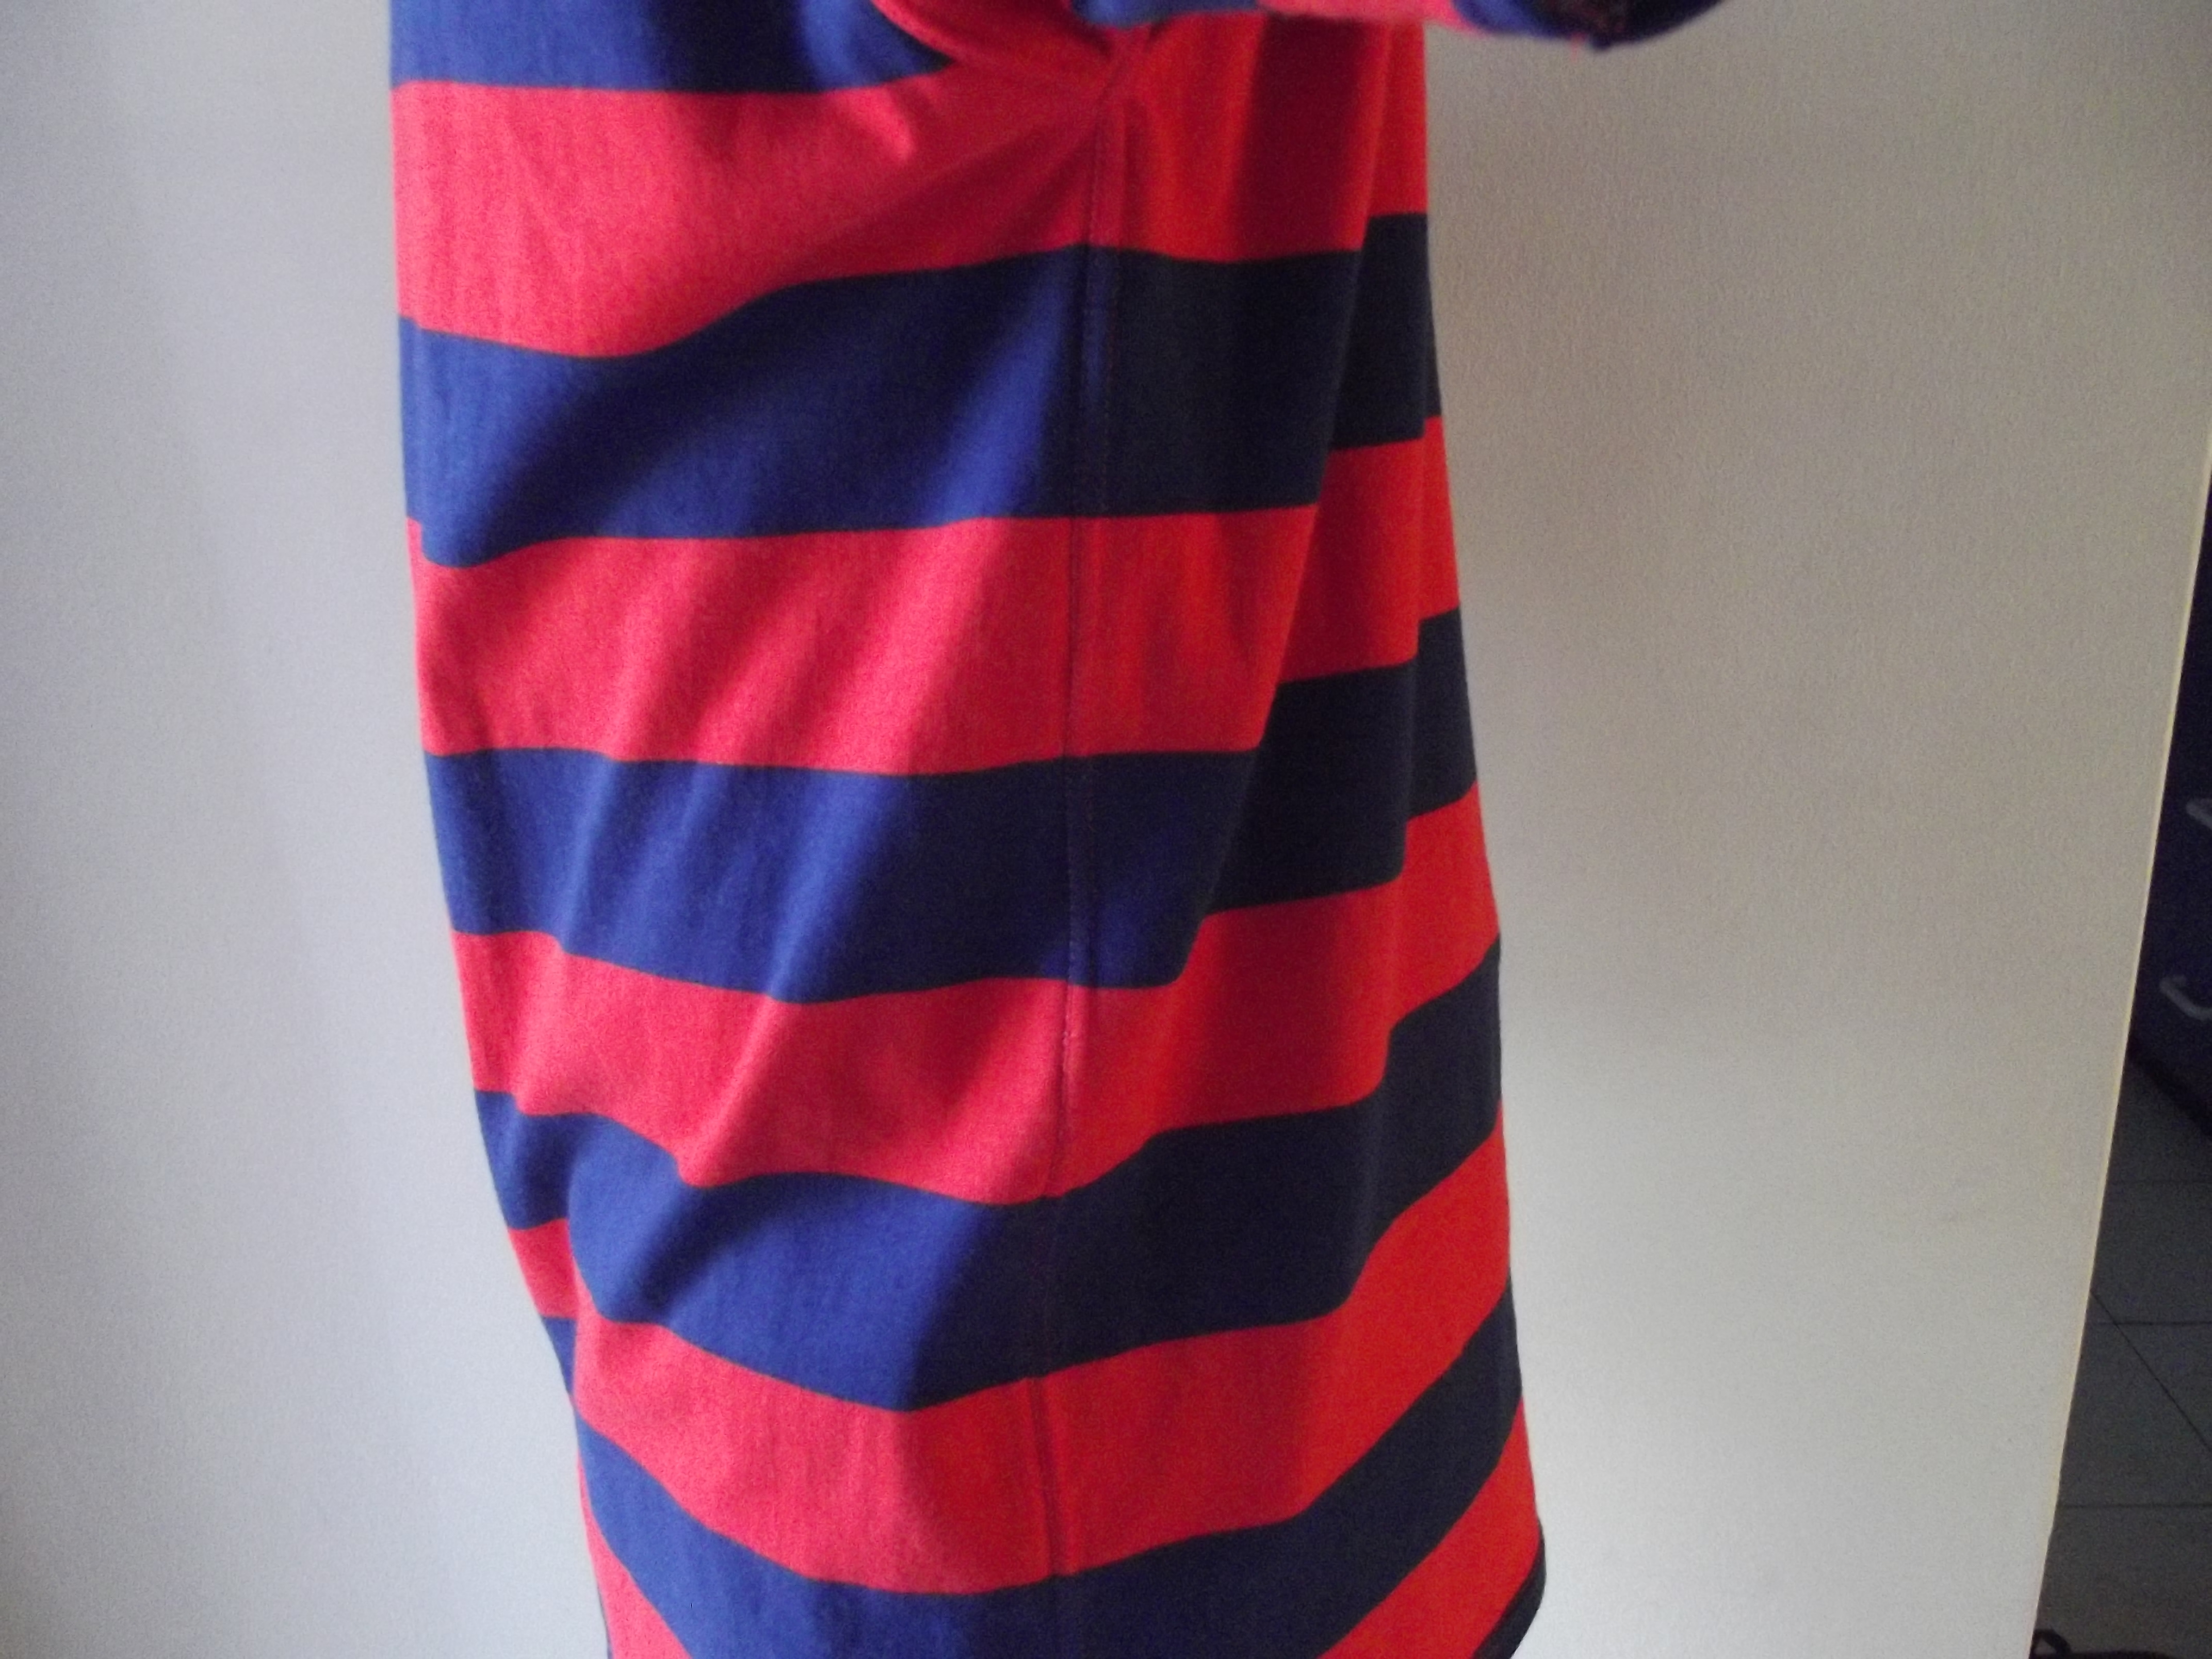
Look at those stripes! I was so proud of these – they match up perfectly!

It turned out really well, and was even better as once finished I didn’t have any Christmas presents left to make! 🙂

Adult v-neck t-shirt

It’s nearly the end of January and I still haven’t finished sharing the things I made for Christmas!

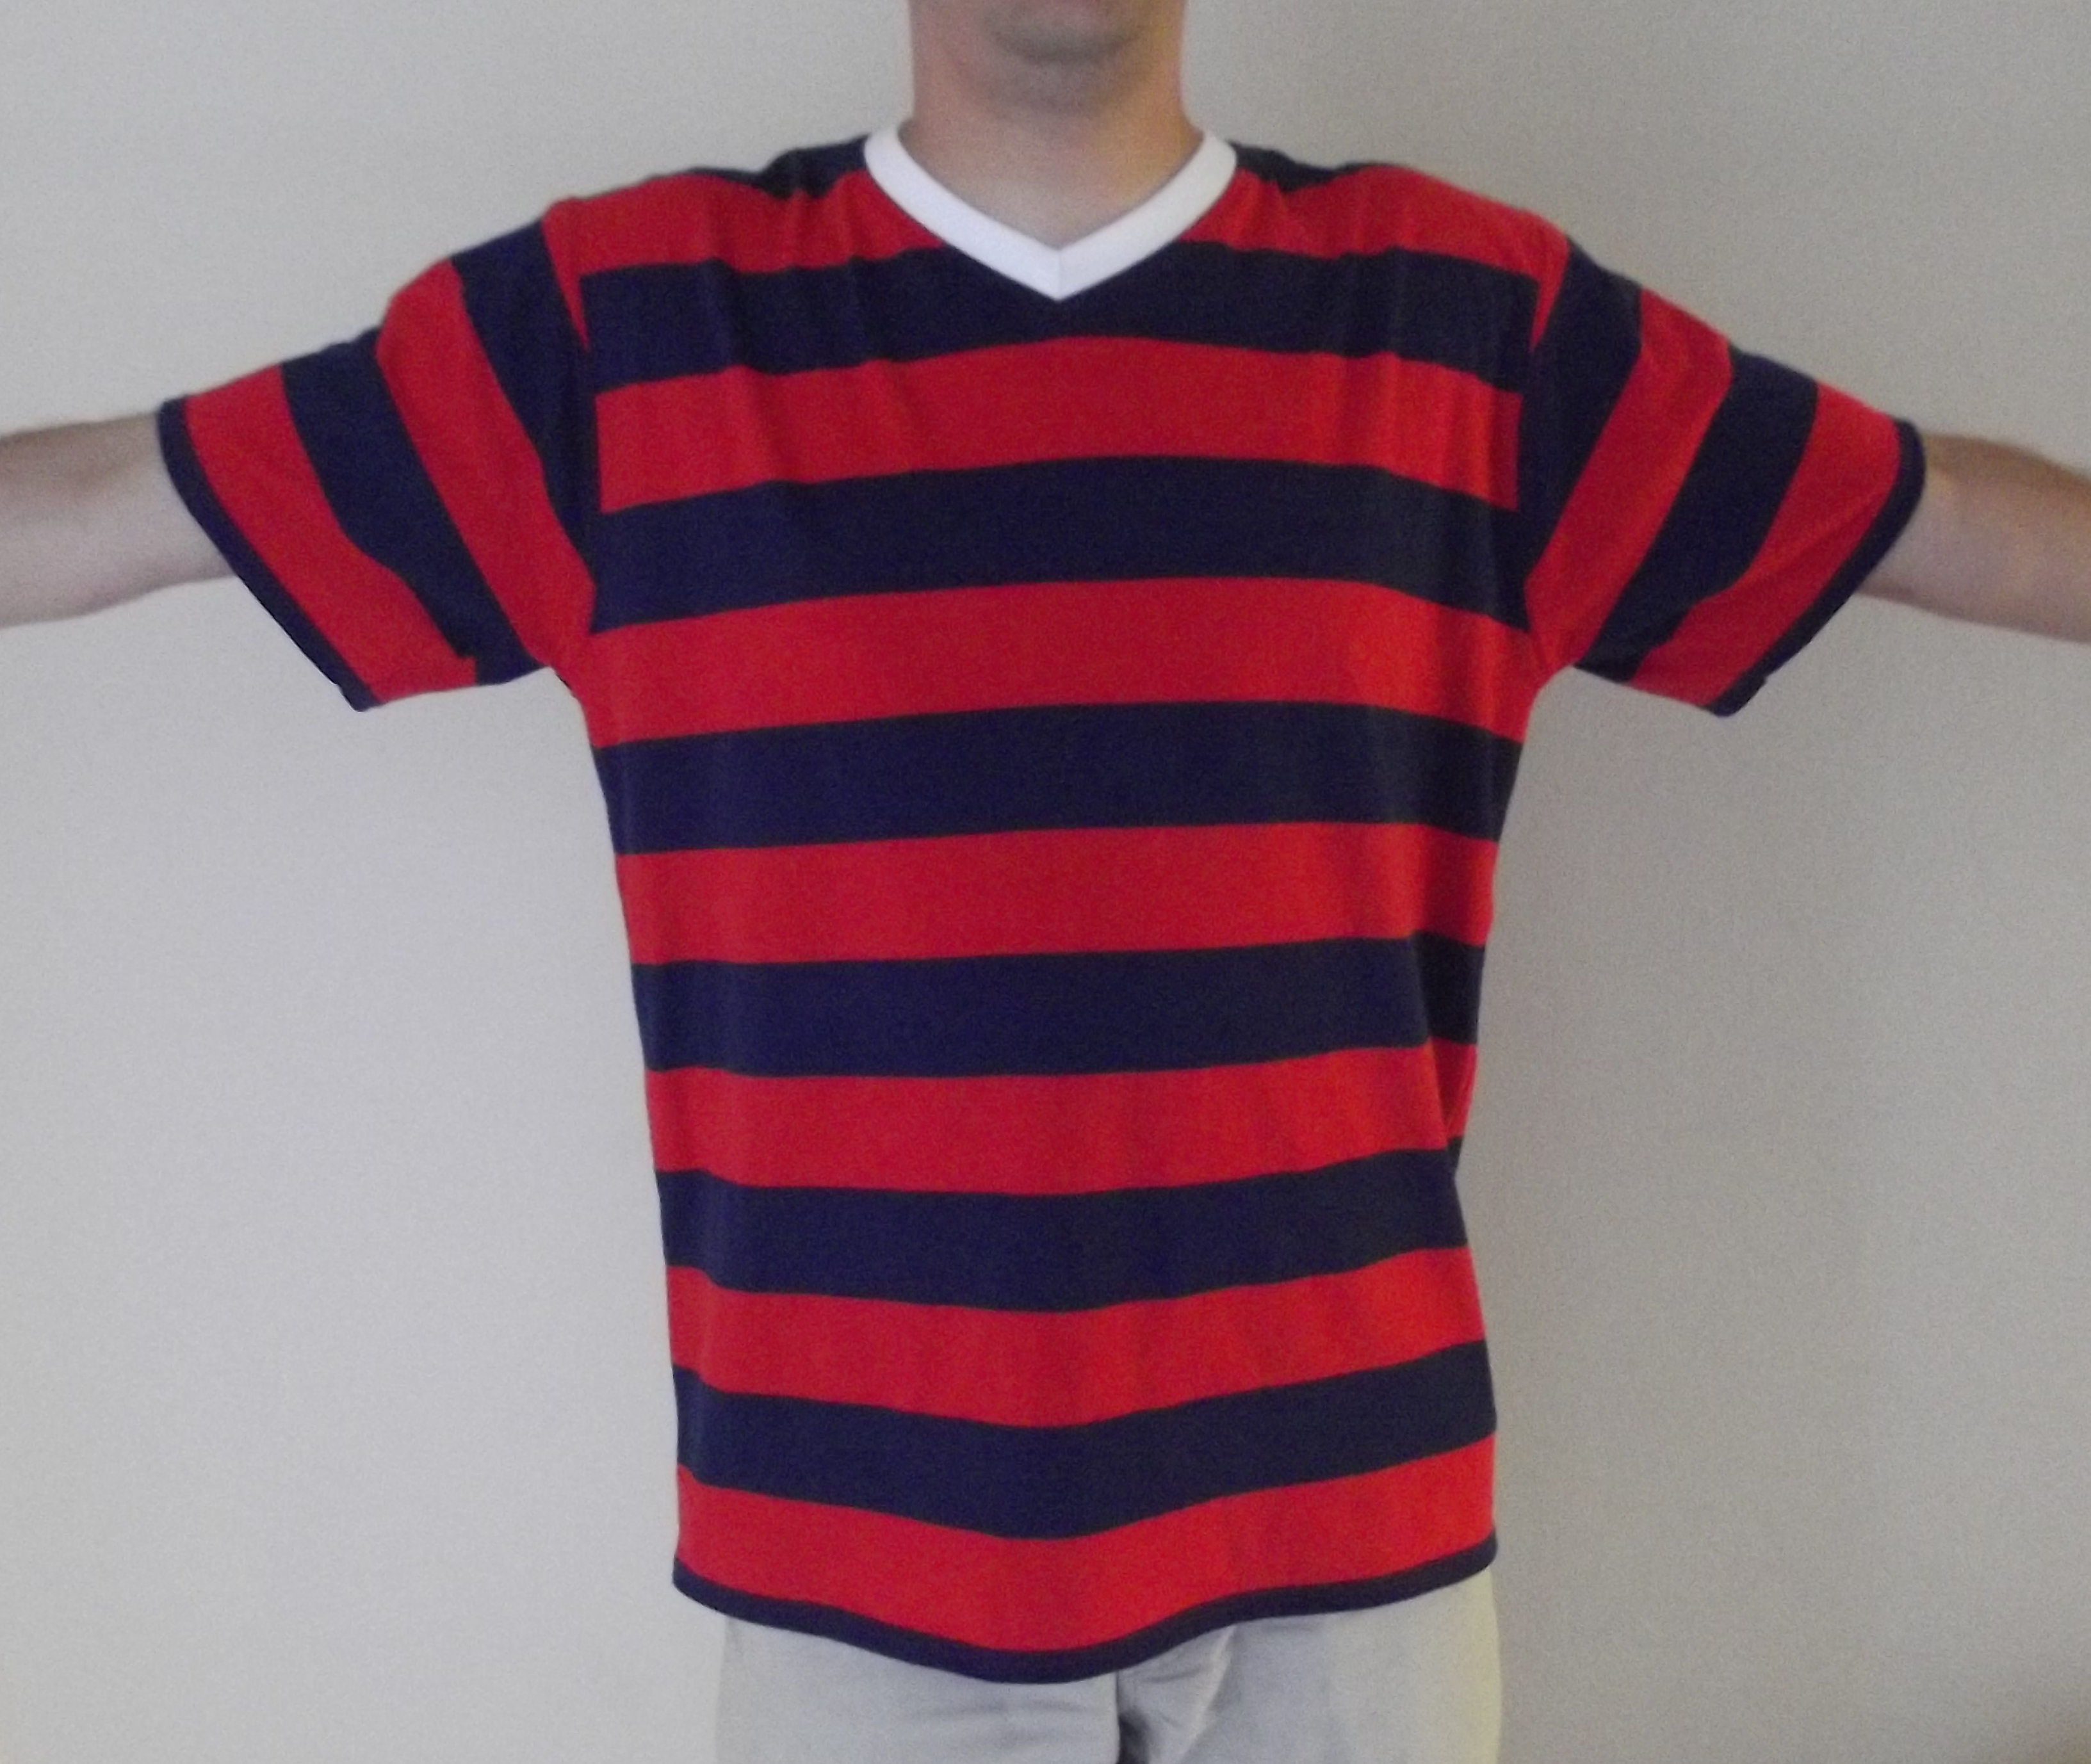
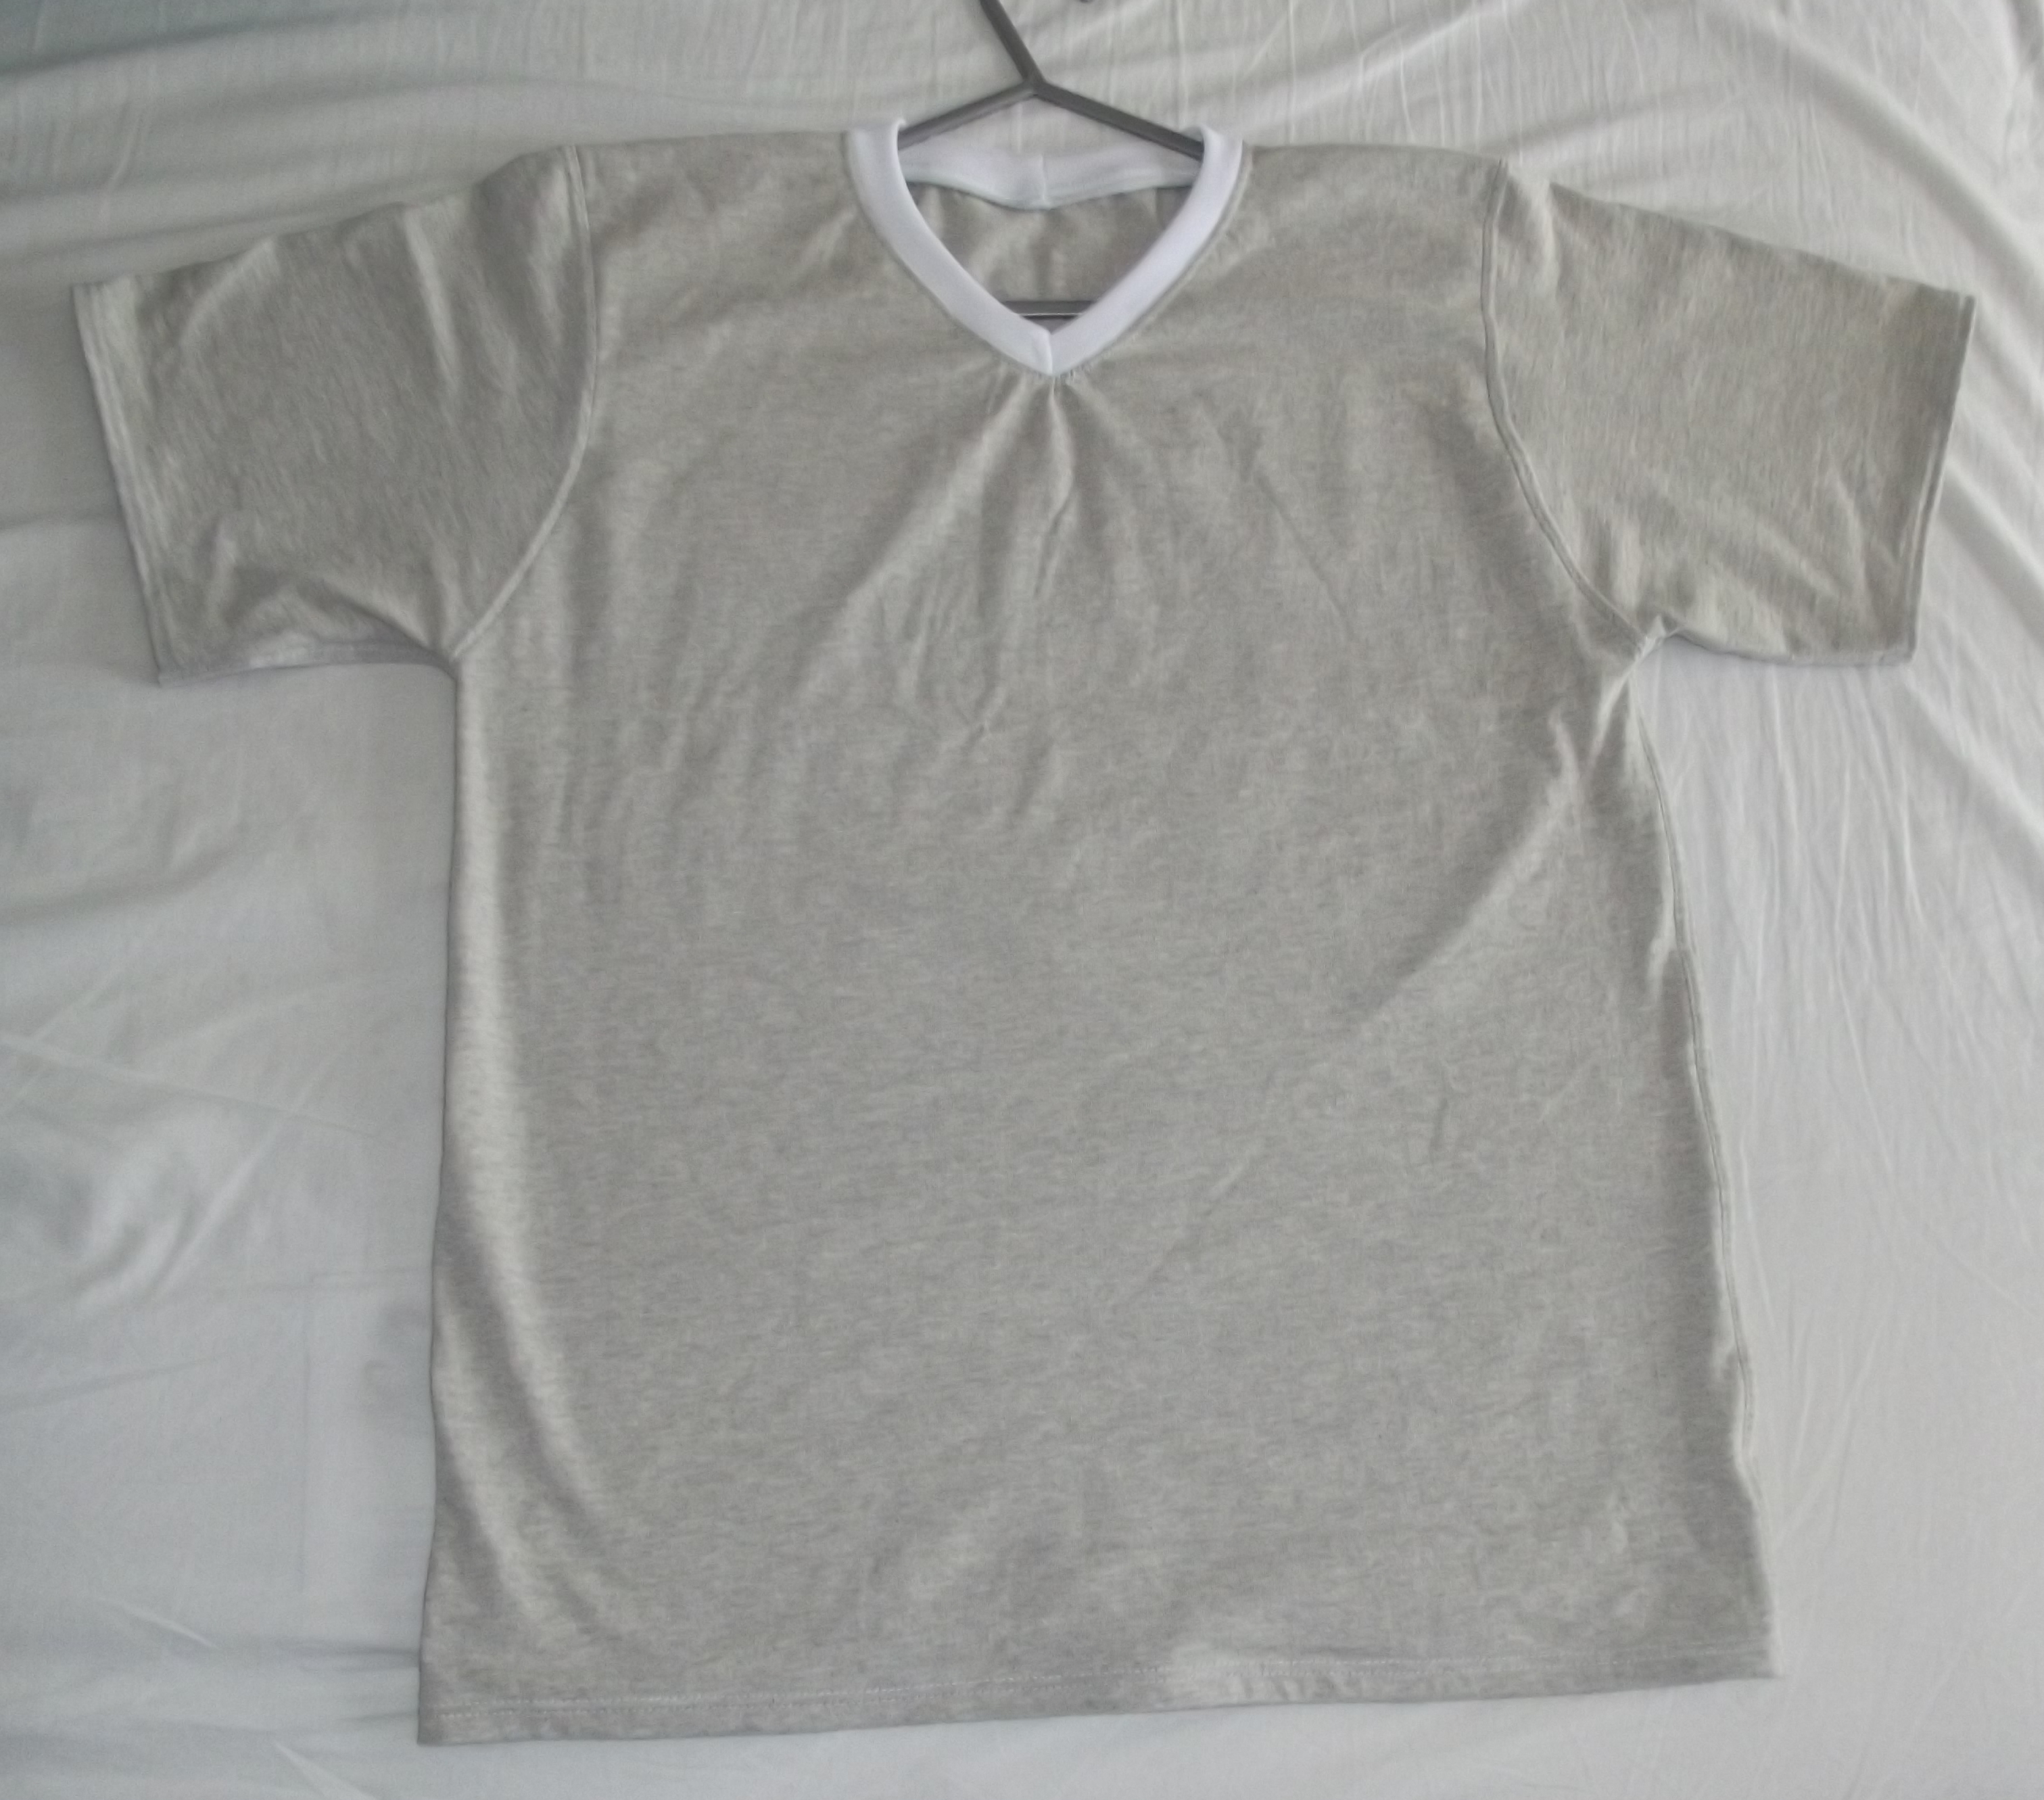
 This was intended to be an adult’s v-neck t-shirt that I was going to give as a present. It is made from grey cotton jersey with white ribbing for the neck.

There are not a huge number of adult patterns out there, at least not as much choice as there seems to be with children’s patterns, and I couldn’t find one with a v-neck at a reasonable (not extortionate) price. I did, however, already have an adult t-shirt pattern with the ordinary rounded neck – the Charlie Tee pattern by Fishsticks Designs. So in a ‘how hard can it be?’ moment I decided to just use that one and draw my own v-neck onto the pattern pieces! 
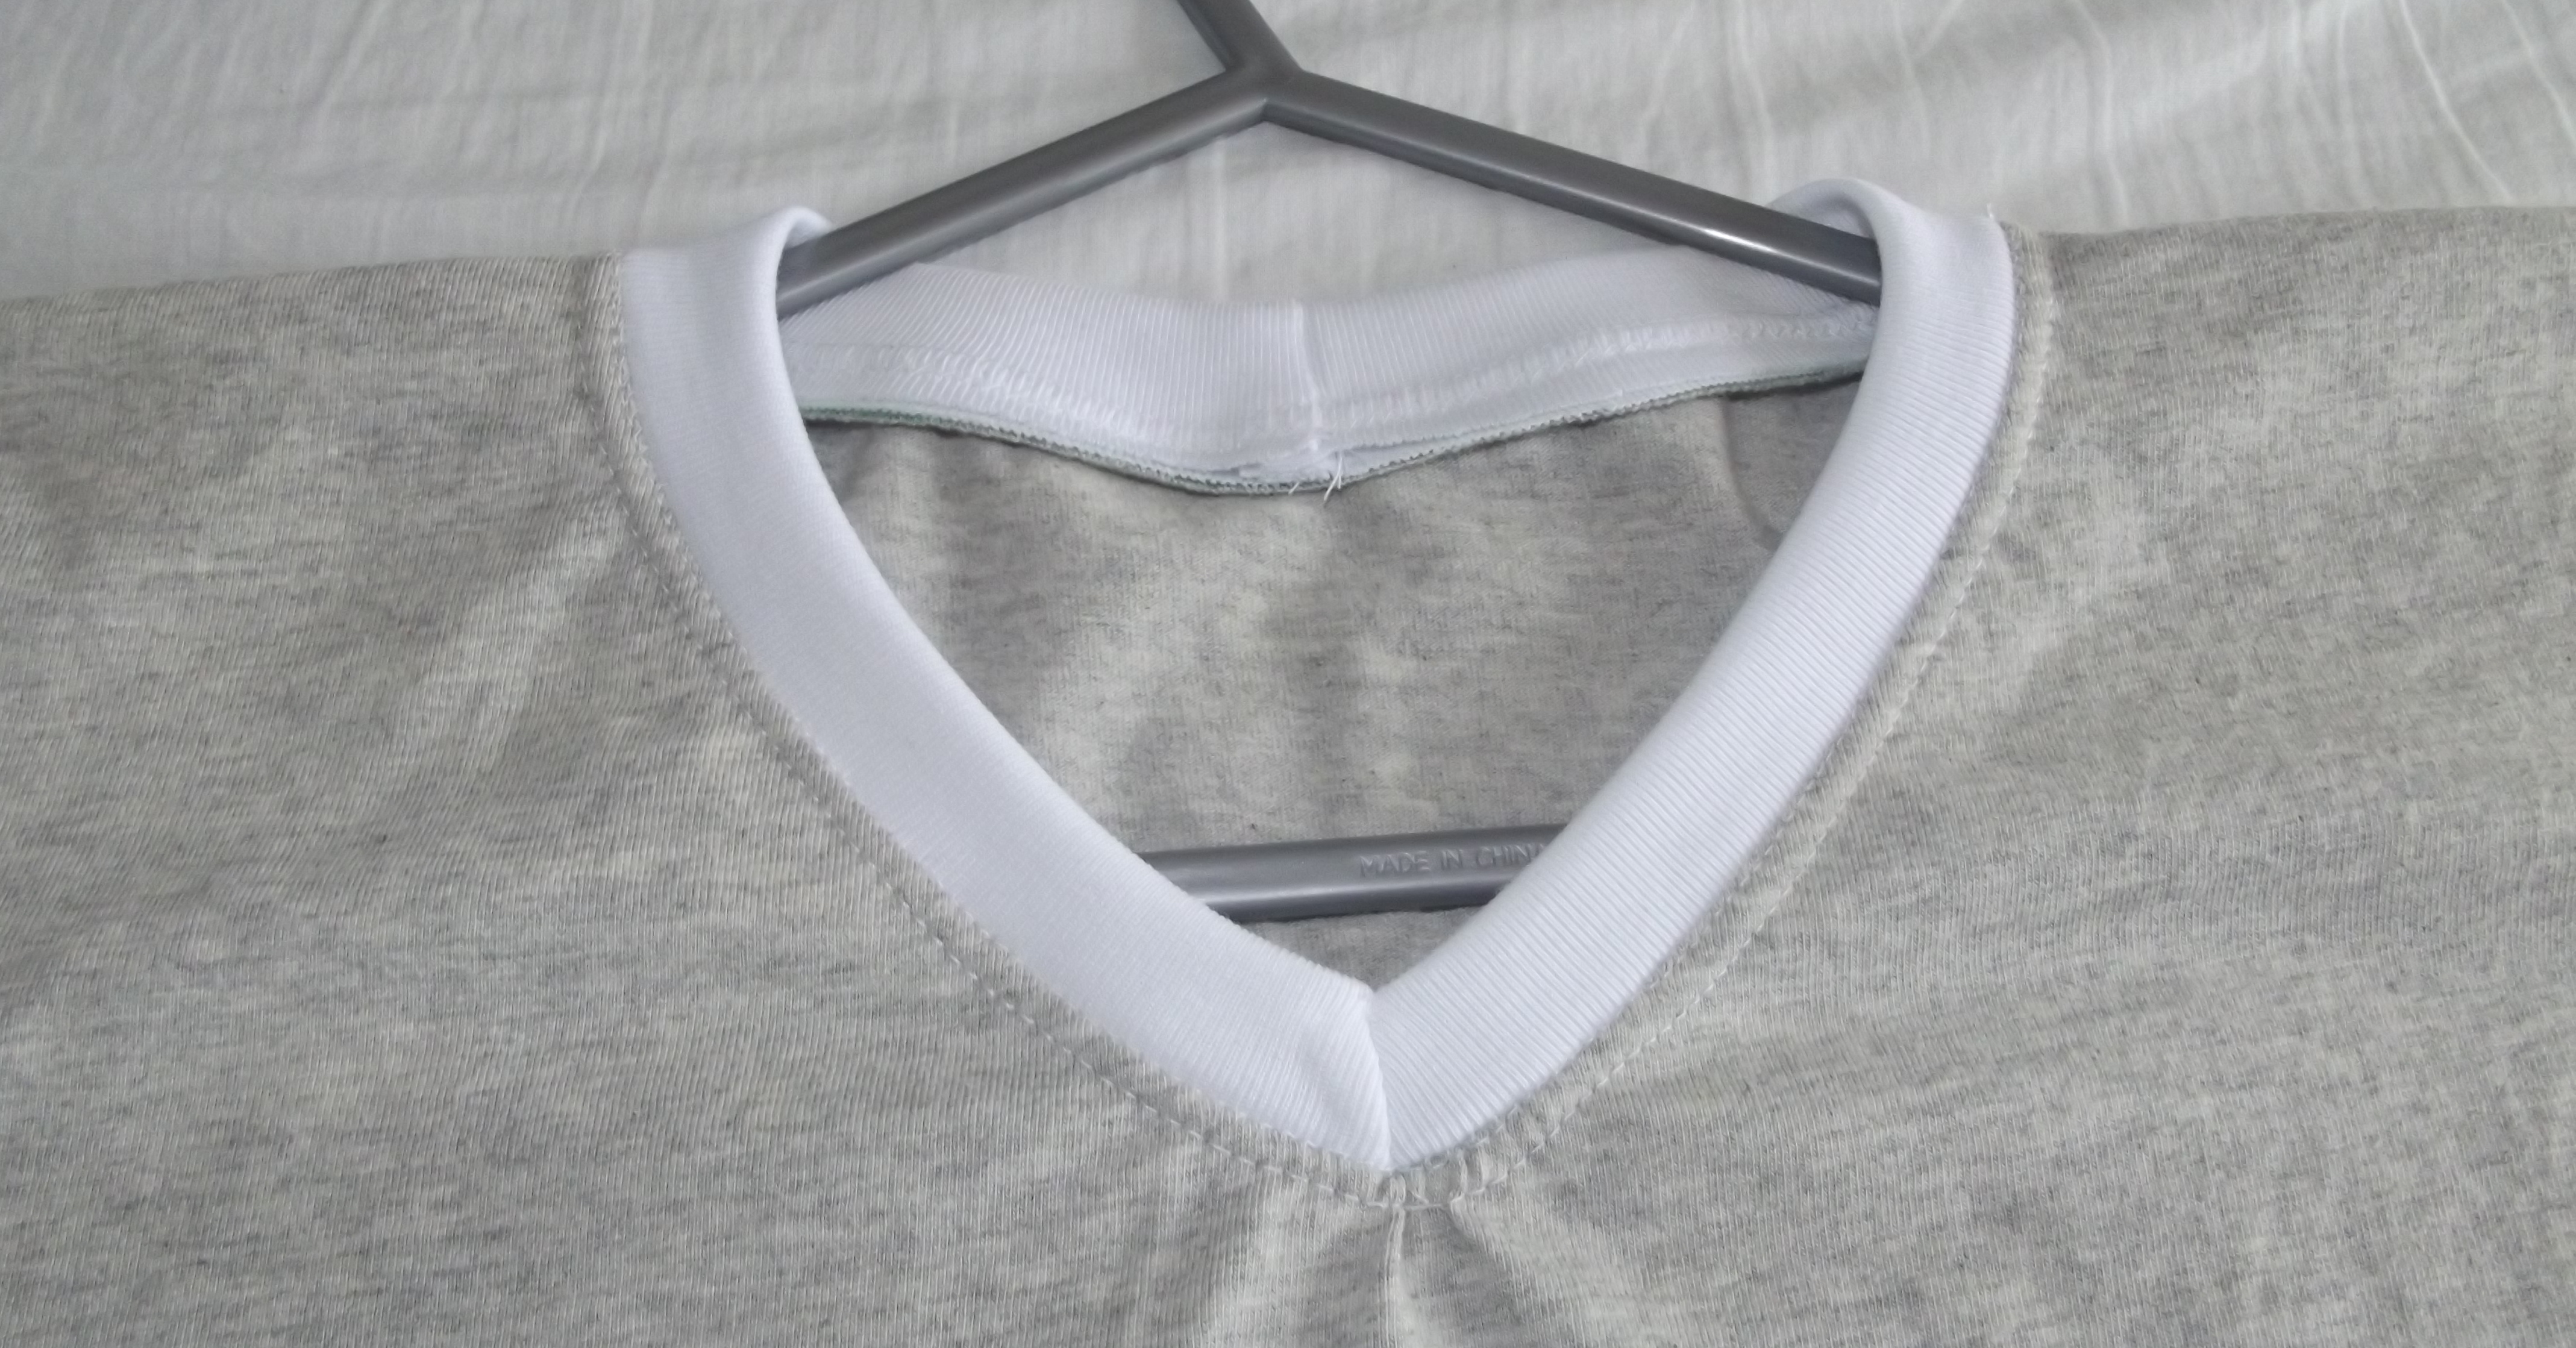
The answer to my question turned out to be – not really that hard! I think the v-neck turned out just fine. I used my twin needle again to do all the hemming … 
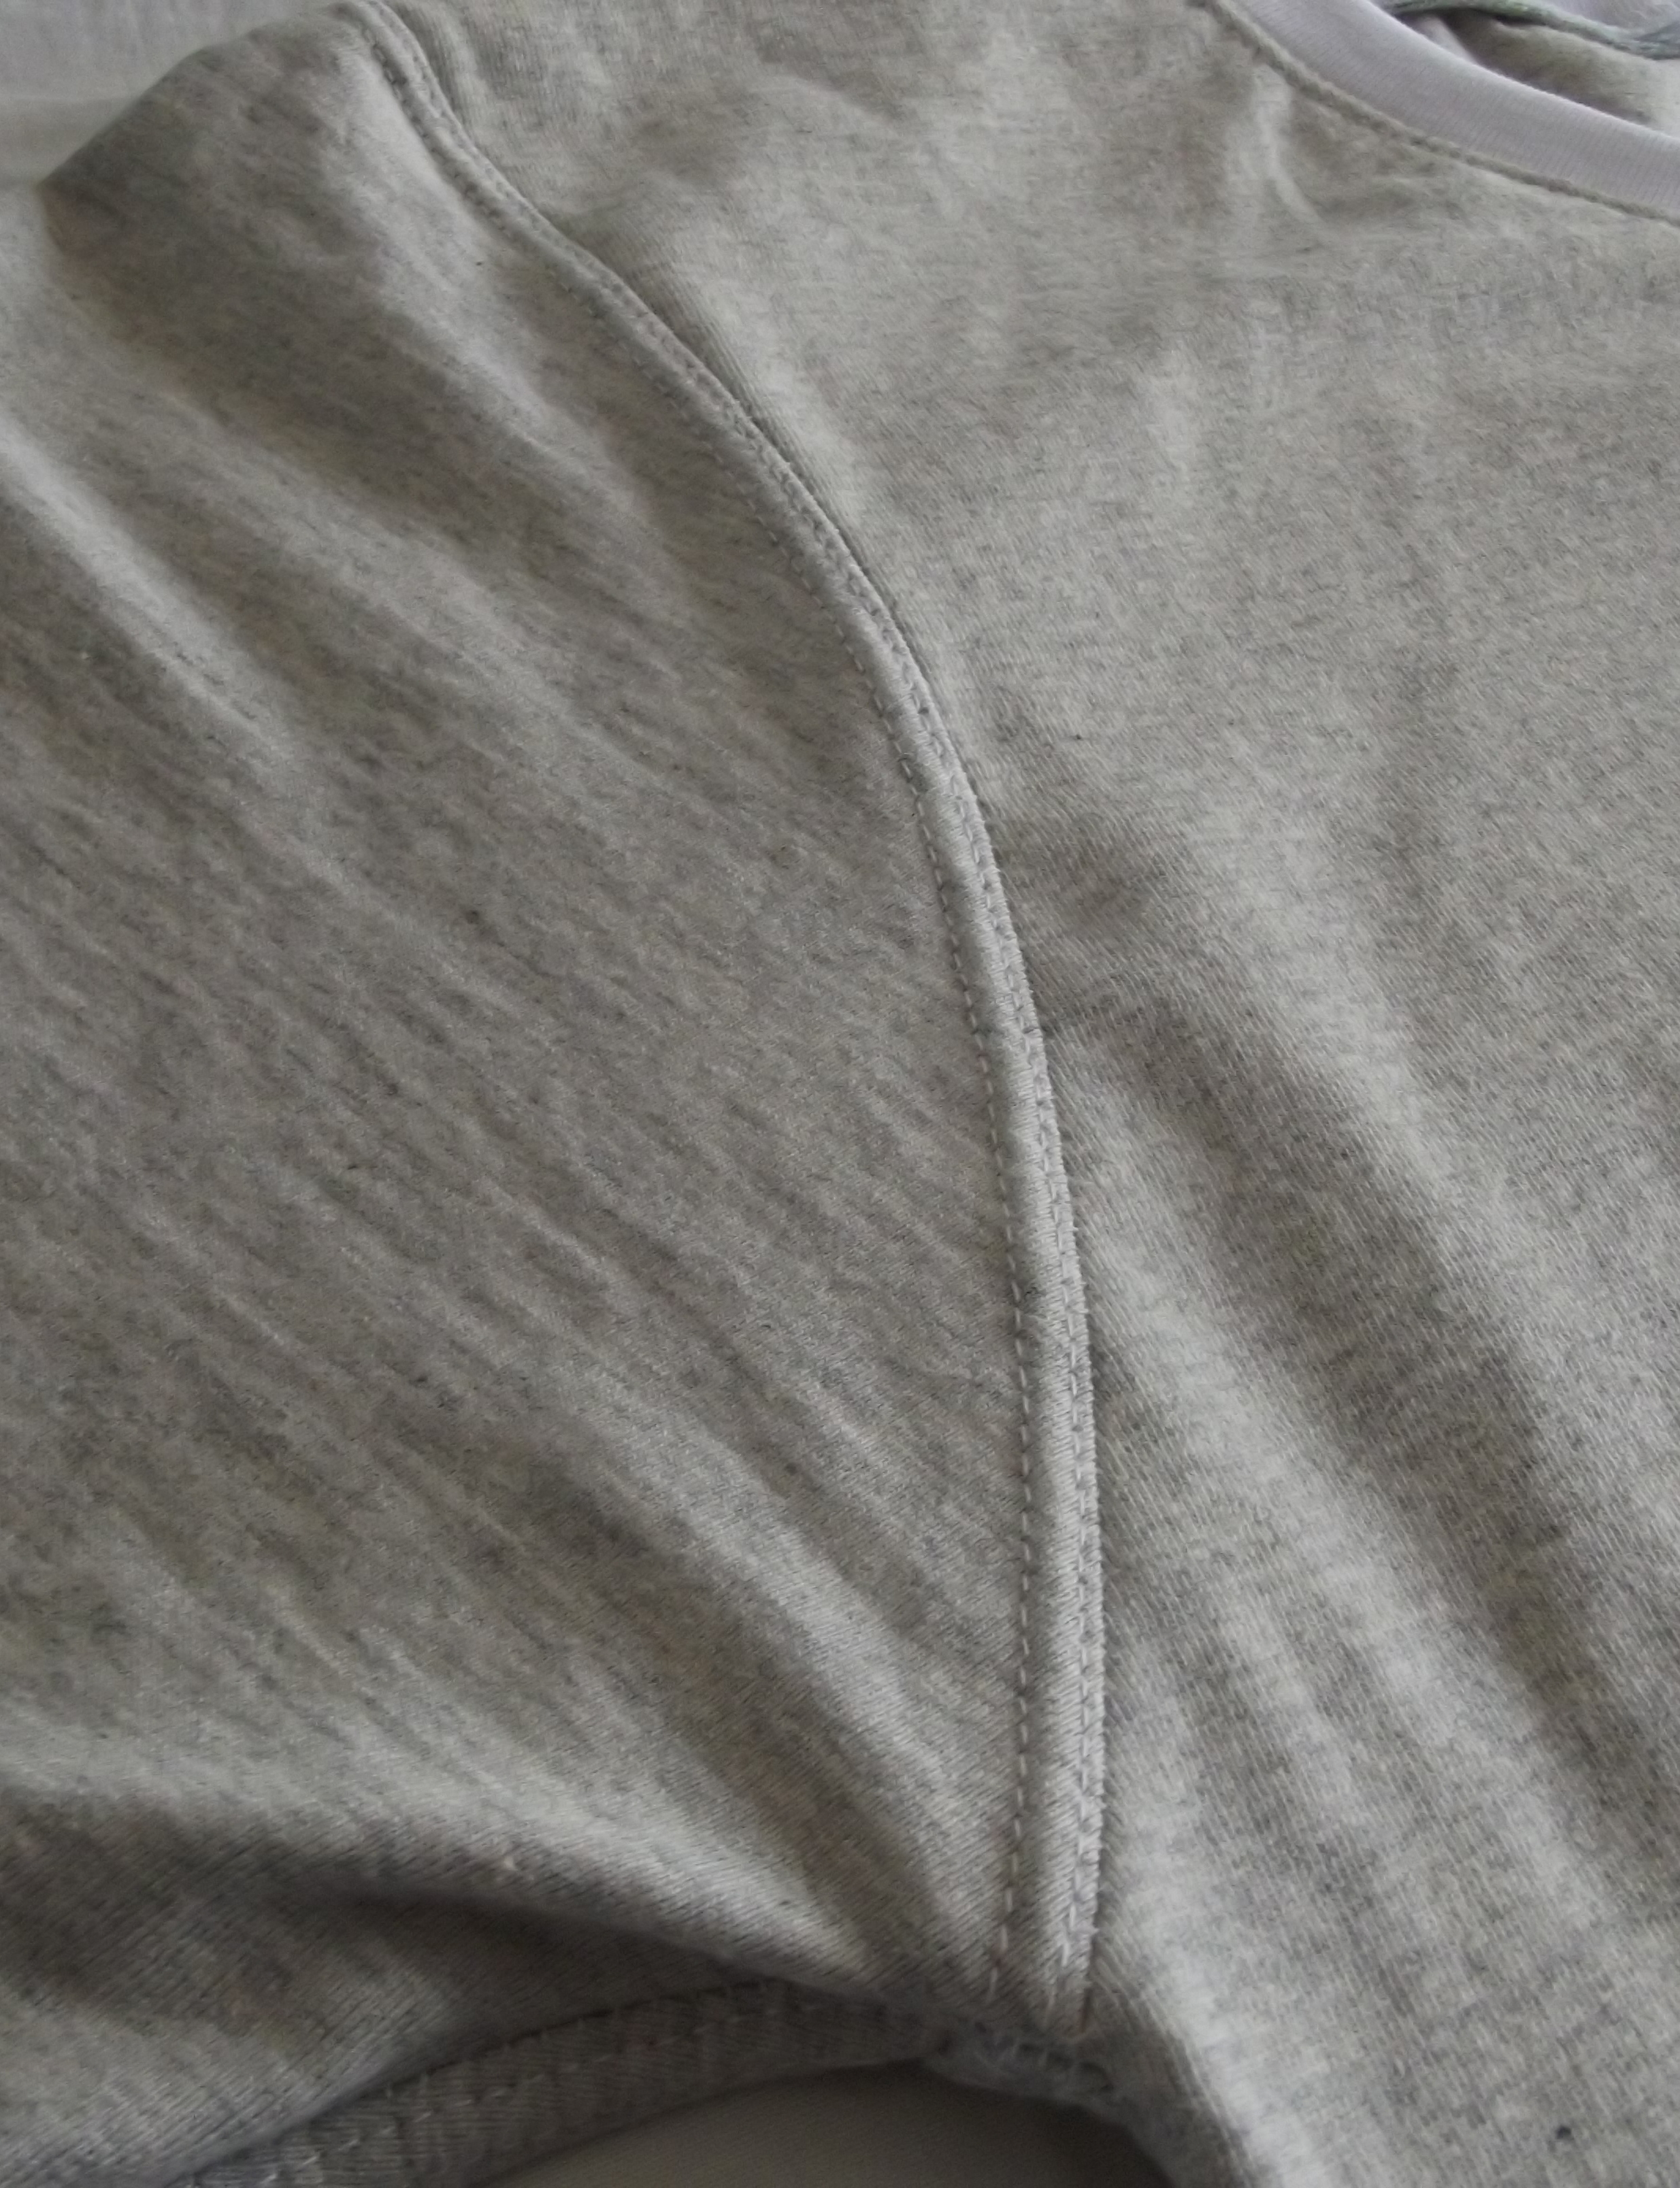
…and I also use it to sew all the seams and topstitching.

I sewed the size medium, and that turned out to be my one mistake. When I got my husband to try it on it was a pretty good fit on him, which meant that it was going to be a tiny bit too small for its intended recipient.
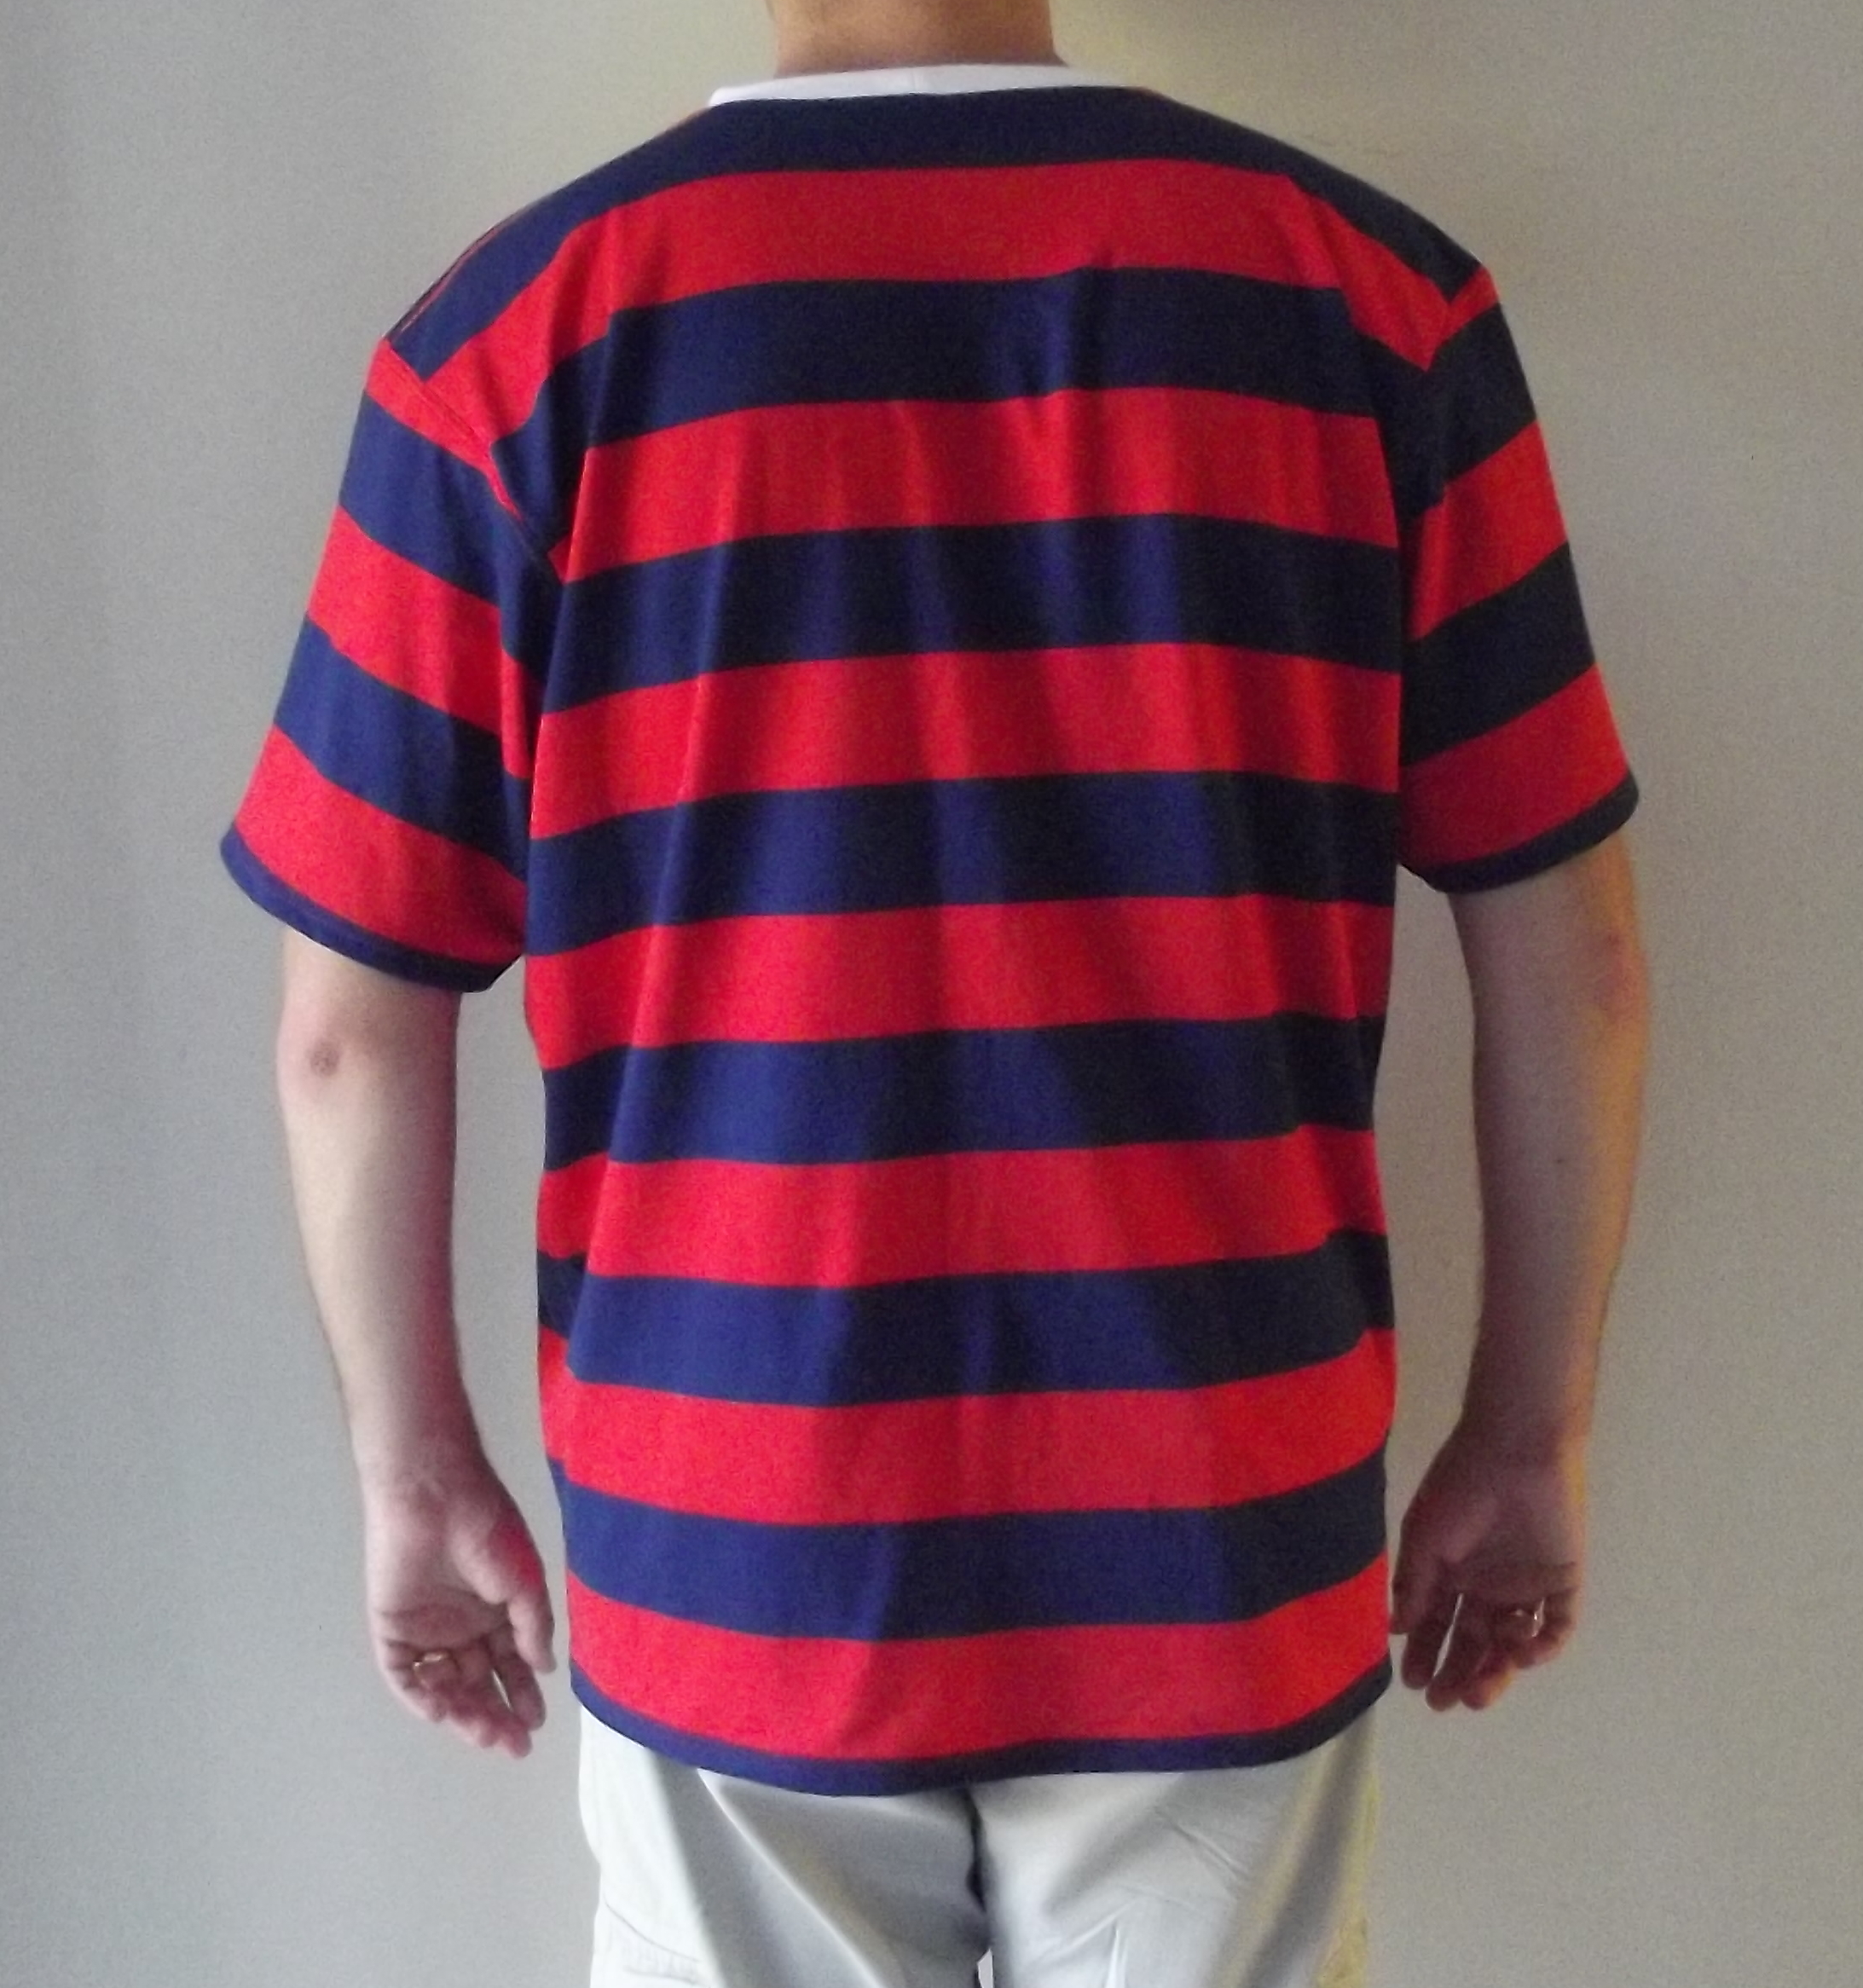
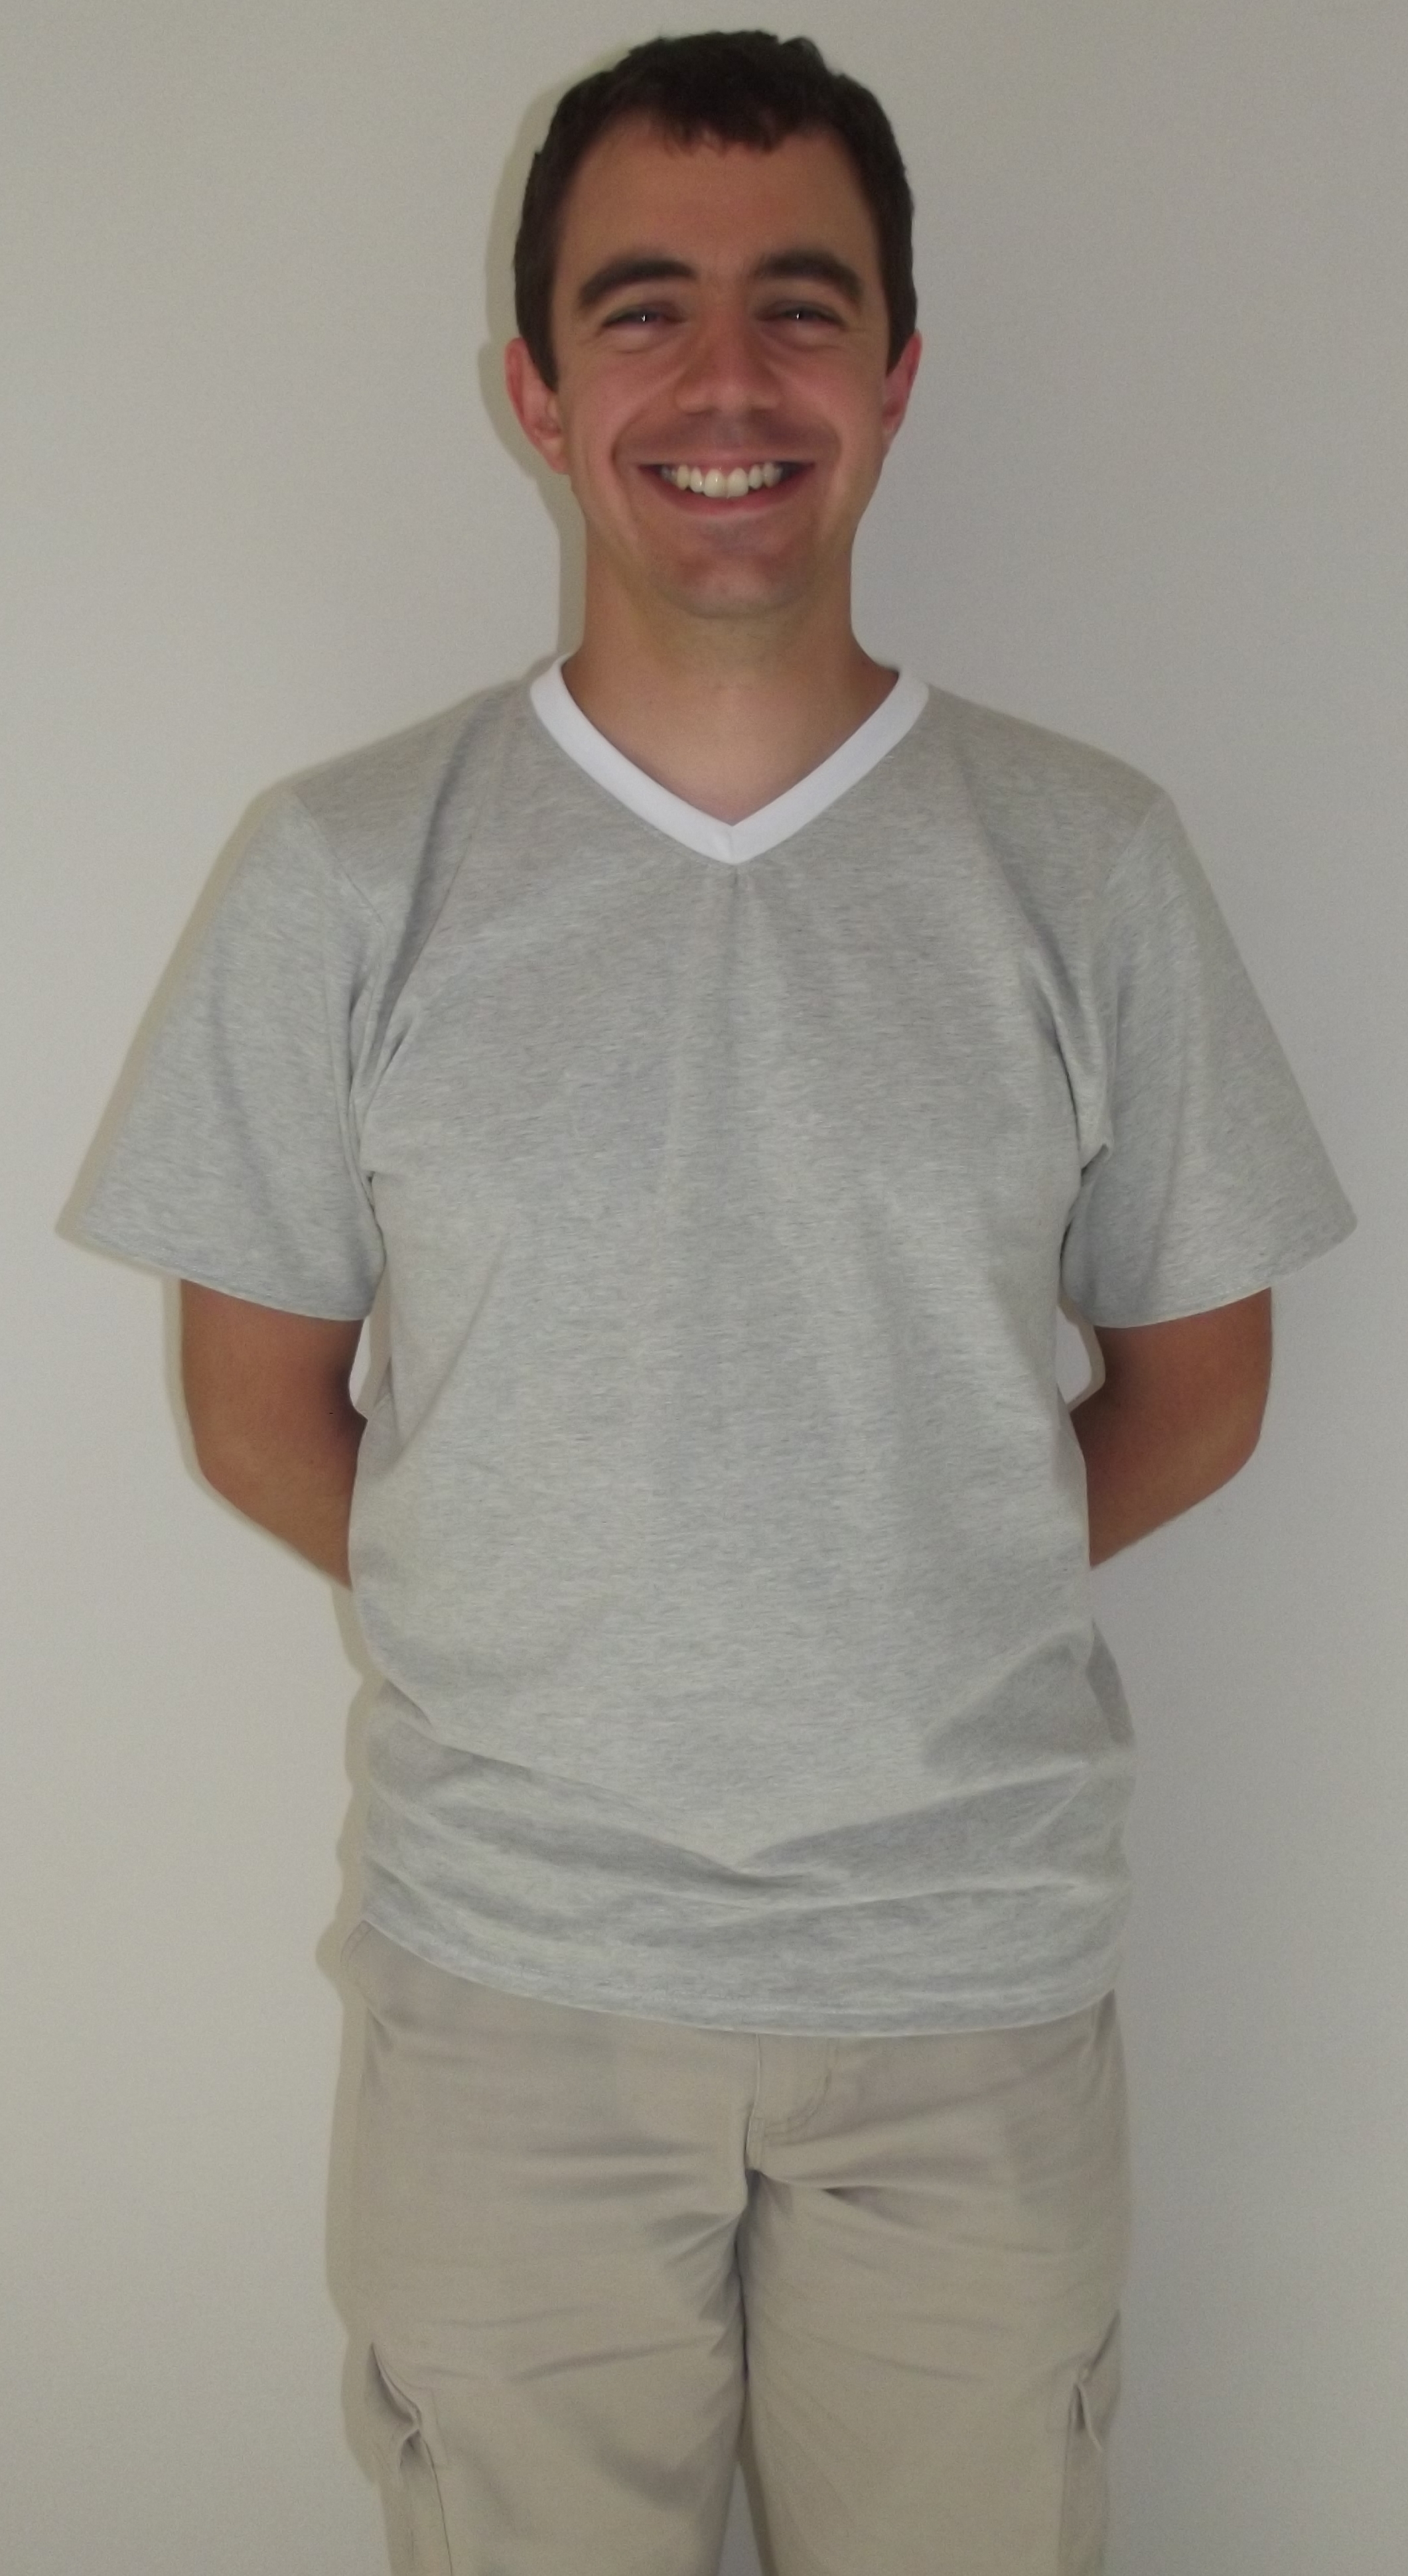
So it was back to the drawing board for the Christmas t-shirt, and this one went into our wardrobe instead. (and he does wear it, so even though he’s not a huge fan of me making him things to wear, he must like it really 🙂 )

Modern QAL – January Block


It’s January! And there’s only four months of the Modern Blocks QAL left!

So everyone who knows me will know that I can’t possibly have made made my block this month. Living in a house with no table/chair/desk and with my sewing machine and all my fabric in a box ready to start its 10,000 mile journey to a new home I’d need some superhuman powers to have made it in the last two days!!

But when I made last month’s block, suspecting that this might be a possibility, I got ahead. So actually I made all the rest of my blocks, since there was only four, which is cheating a little bit, but now I can still link up when everyone else does – yay!

All of the blocks for the QAL come from this book:


This month’s block is called Everything Equal, and Alyce’s tutorial can be found on Blossom Heart Quilts’ blog.

I looked at all the colours in the fabric I’m using for my blocks, and couldn’t resist making it a rainbow!

I think it looks really pretty!


You can see all the other blocks that people have made over on And Sew We Craft 🙂


This post contains affiliate links.

Children’s Pencil Cases

For Christmas I made my nieces and nephew pencil cases for their presents.

Two of them I made the same as the one that went wrong, but these ones turned out well!

The first was made with pink and purple zips with pink cotton for the back:

The second I made with a rainbow of zips:

I used this pretty multi-coloured chevron cotton for the back of it:

I filled each one with some stationery items I thought the girls would like:

My nephew is a superhero fan, so for him I made this superhero pencil case:

I hope they like them!